> For the complete documentation index, see [llms.txt](https://docs.colormass.com/llms.txt). Markdown versions of documentation pages are available by appending `.md` to page URLs; this page is available as [Markdown](https://docs.colormass.com/building-blocks/materials/add-a-material.md).
# Add a Material
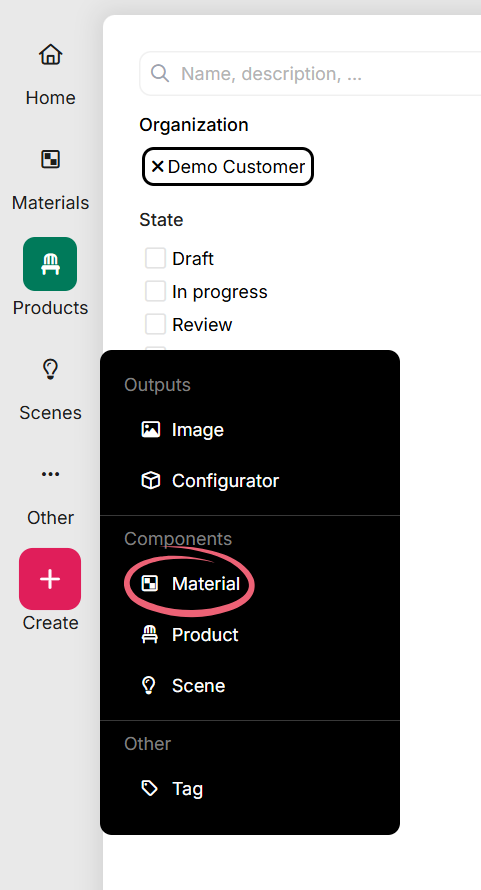
Press the *+Create* button and then click on *Material*:
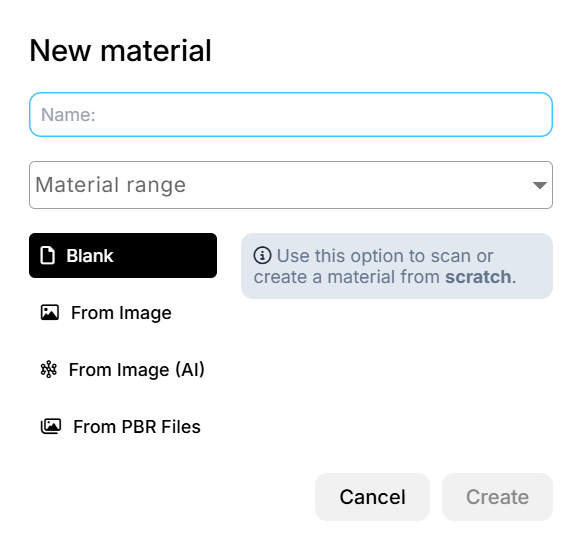
Next there will be a prompt that will ask for the name of the material:
Next you should select how you would like to create a new material:
* **Blank:** Choose this if you are scanning with the colormass scanner (see [Scanning](/scanning-and-tiling/scanning.md))
* **From Image:** Choose this if you would like to create the material using a single image (see [Upload Image as a Material](/building-blocks/materials/add-a-material/upload-image-as-a-material.md))
* **From Image (AI):** Choose this if you would like to create the material using a single image but would like to enhance it with the colormass AI material creation (see [Upload Image as a Material (AI)](/building-blocks/materials/add-a-material/upload-image-as-a-material-ai.md)). Please note that this AI technology is still experimental. Check for more details about the technology.
* **From PBR Files:** Choose this if you would like to upload your own maps (see [Upload PBR Materials (Custom)](/building-blocks/materials/add-a-material/upload-pbr-materials-custom.md))