> For the complete documentation index, see [llms.txt](https://docs.colormass.com/llms.txt). Markdown versions of documentation pages are available by appending `.md` to page URLs; this page is available as [Markdown](https://docs.colormass.com/building-blocks/products/advanced/decals.md).
# Decals
## Adding a Decal
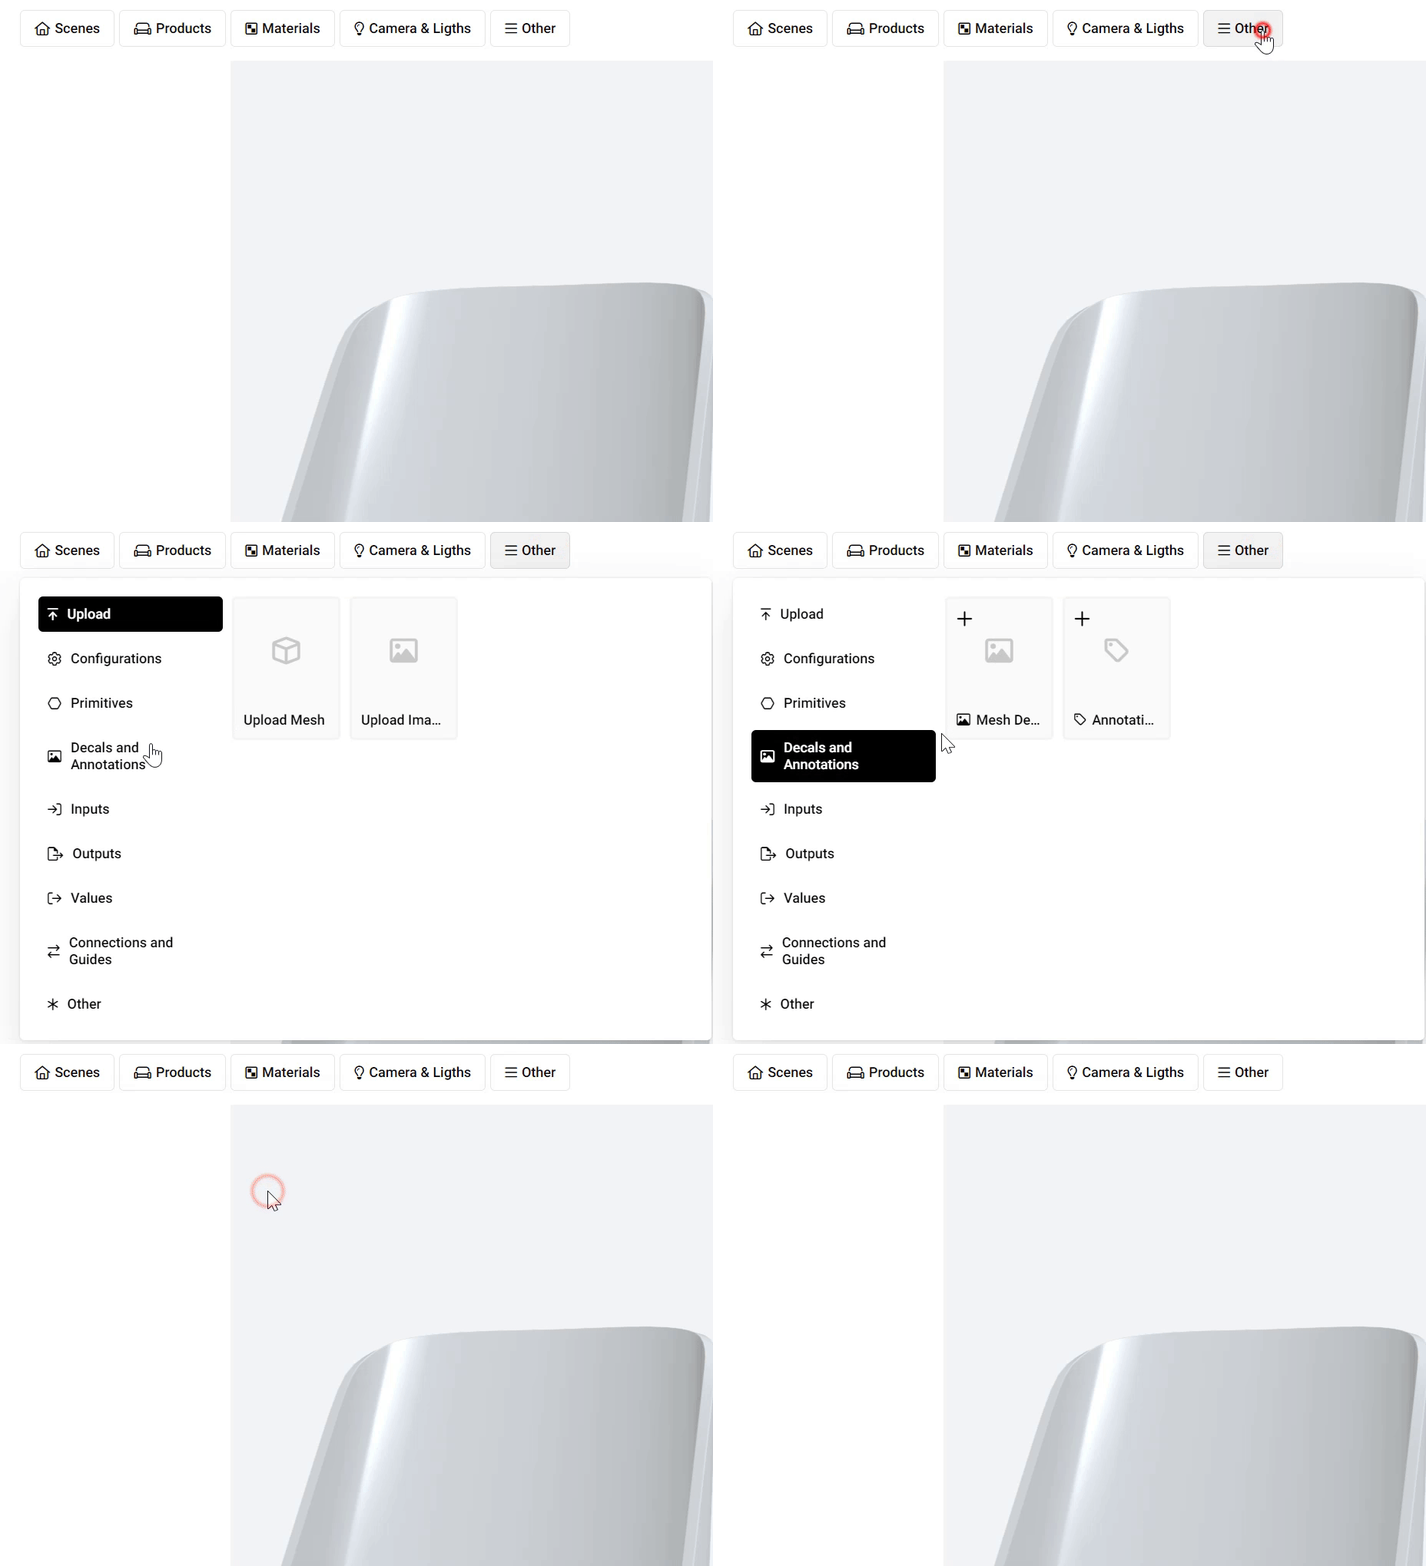
First of all, we would need to add the decal. Go to the *Other* button in the top bar and select Mesh Decal.
Add a Decal
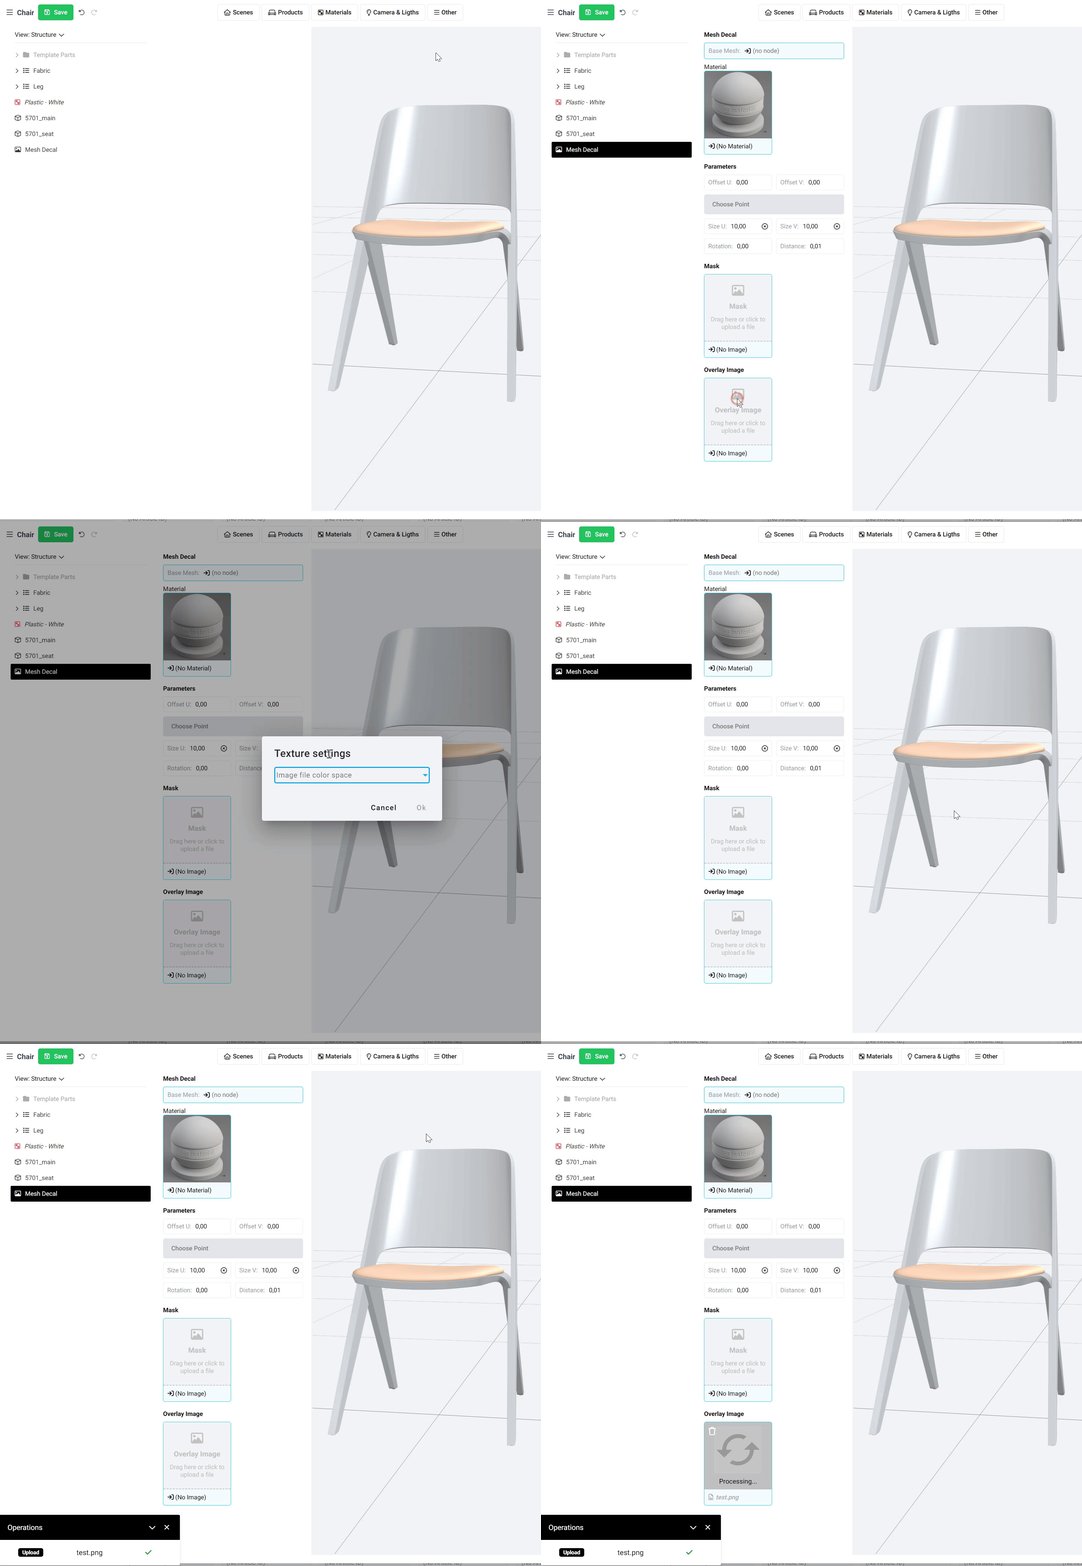
Once the *Decal* appears in your product tree, you will need to select an overlay image. To do this simply click on the *Overlay Image* area:
Upload decal
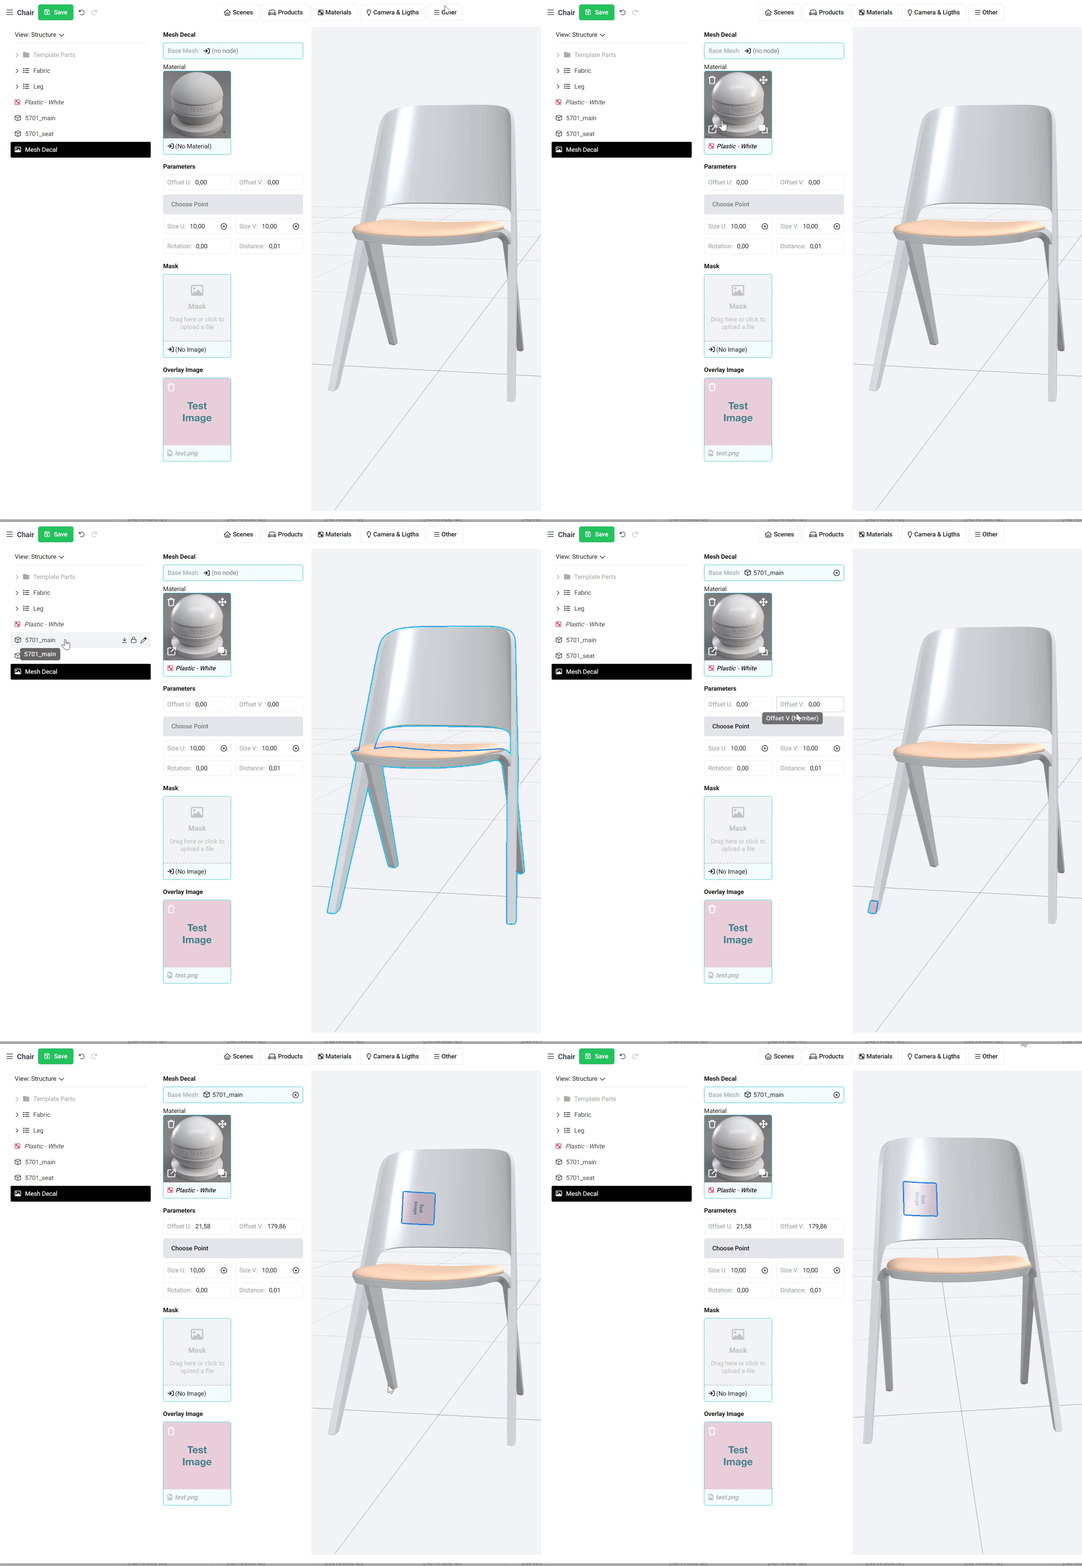
Once you have uploaded your decal you would need to do three important steps:
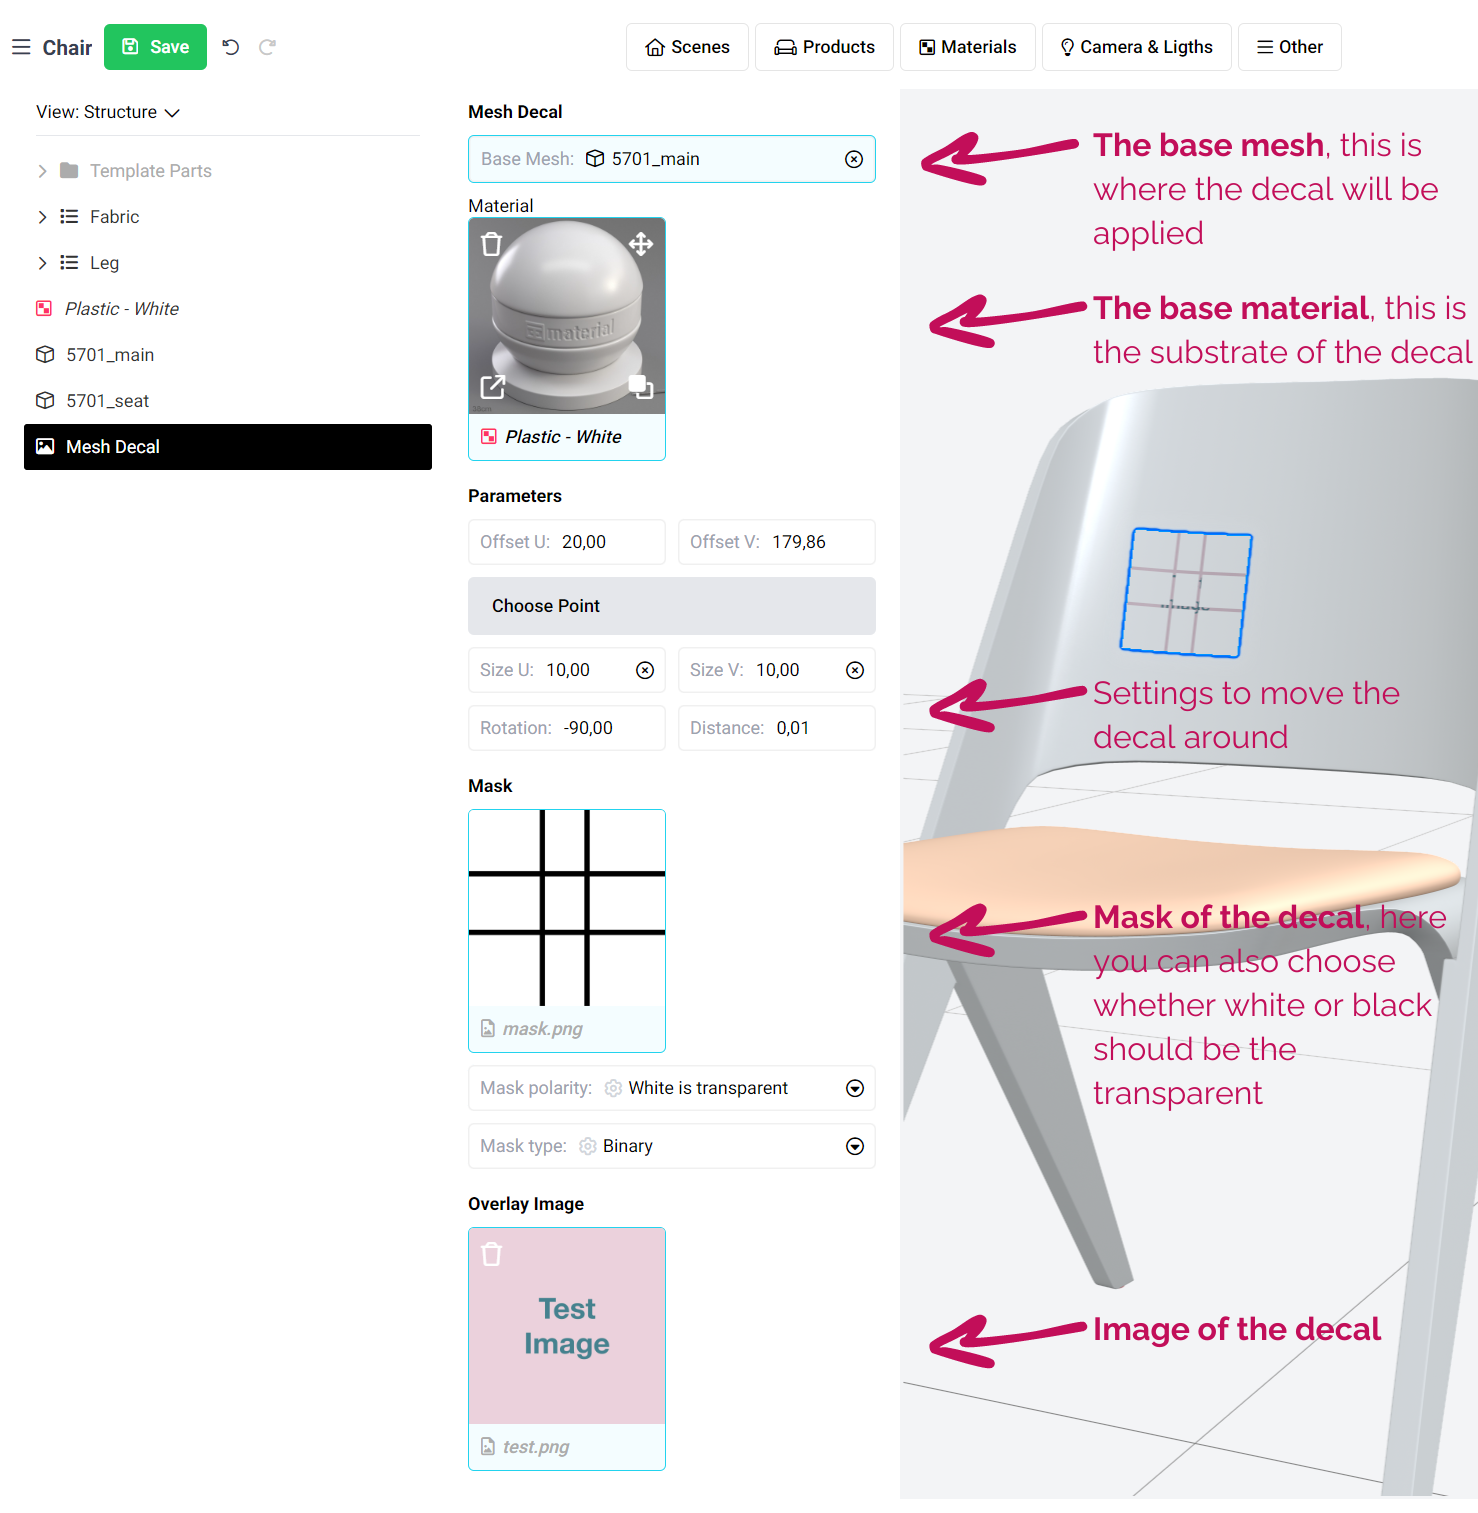
* Assign the base mesh (by dragging and dropping it into the *Base Mesh* field): this is the mesh where the decal will be applied.
* Assign a base material (by dragging and dropping it into the *Material* field): this serves as the substrate material for applying the image.
* Choose a point: Select a point on the mesh where the decal should be placed.
You can see all these three points in the screenrecording below.
Assign the base mesh and the base material
## Move the Decal
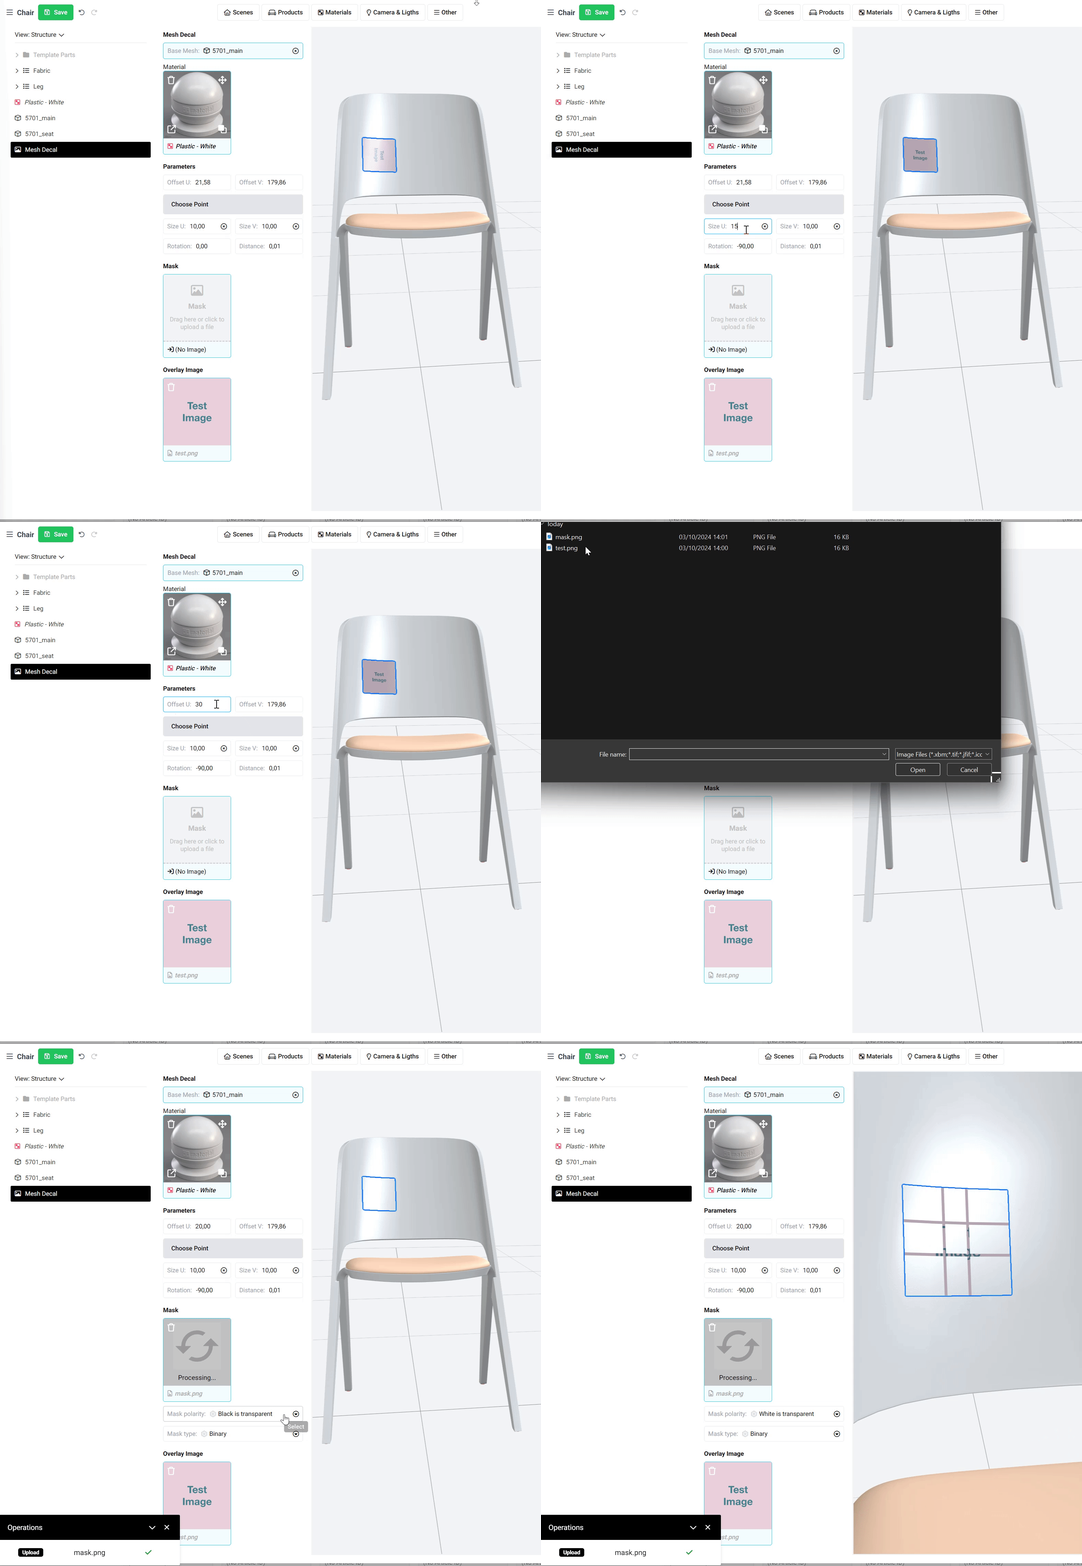
Once you uploaded your decal, you also have various options to
* Change the size of the decal with *Size U* and *Size V,* just make sure to keep your aspect ratio match to your original image (to avoid distortion)
* Change the exact position of the decal with *Offset U* and *Offset V*
* Rotate your decal with the *Rotation* field
## Overview
Below you can see a small overview of the Decal options.