# Camera

## Add a Camera

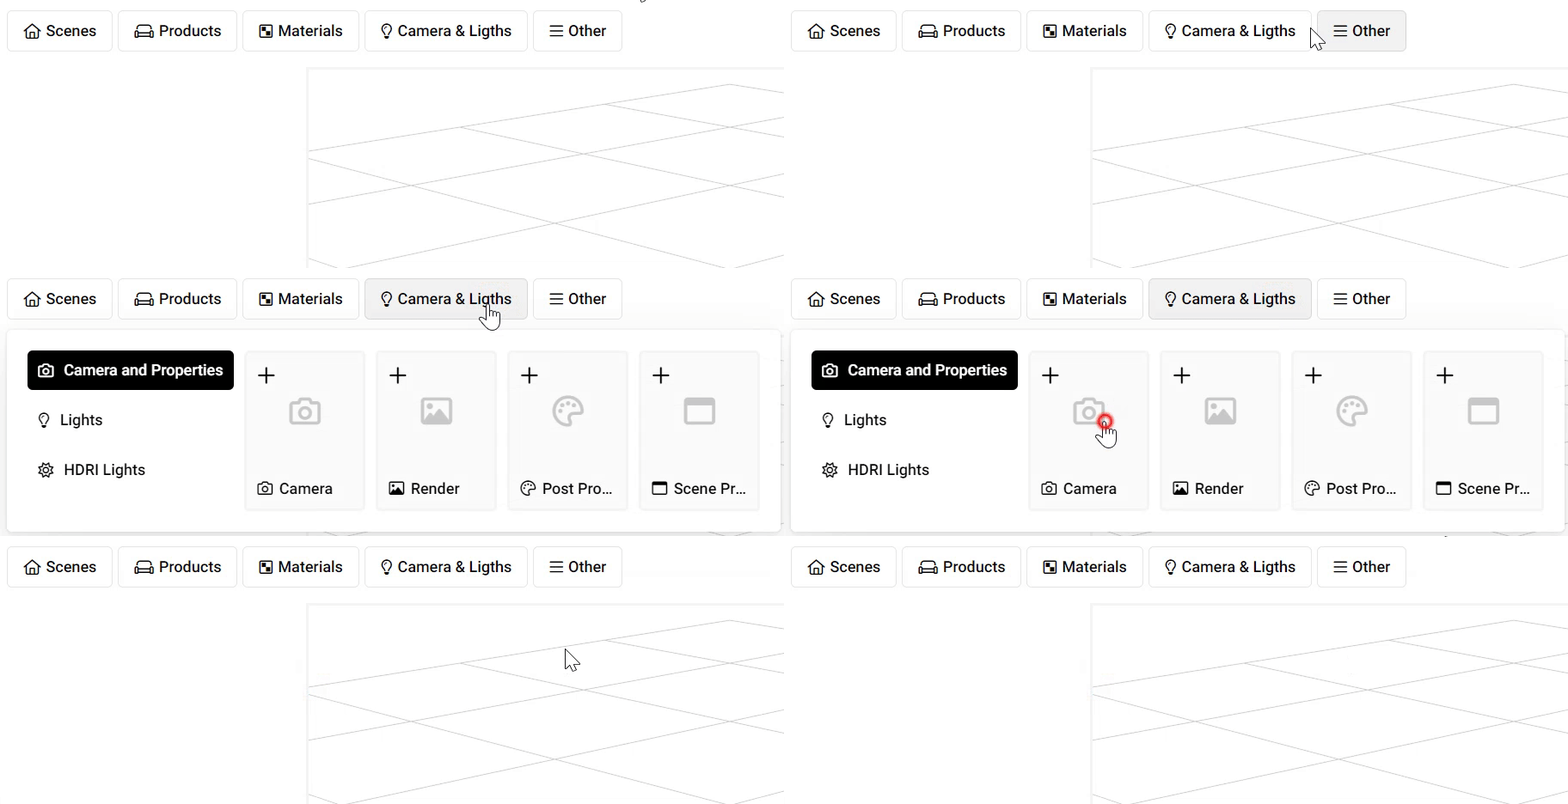
You can add a camera by clicking on the *Camera* *& Lights* button and then clicking on *Camera.*

<figure><img src="/files/TXn3lYxpLMf7wZWlkYqc" alt="" width="563"><figcaption><p>Adding a camera</p></figcaption></figure>

When you click on the camera, you'll see various options in the inspector area (middle column). Among these, you'll notice the Preview section. Furthermore a blue rectangle will appear in the 3D editor, which represents the focus plane.
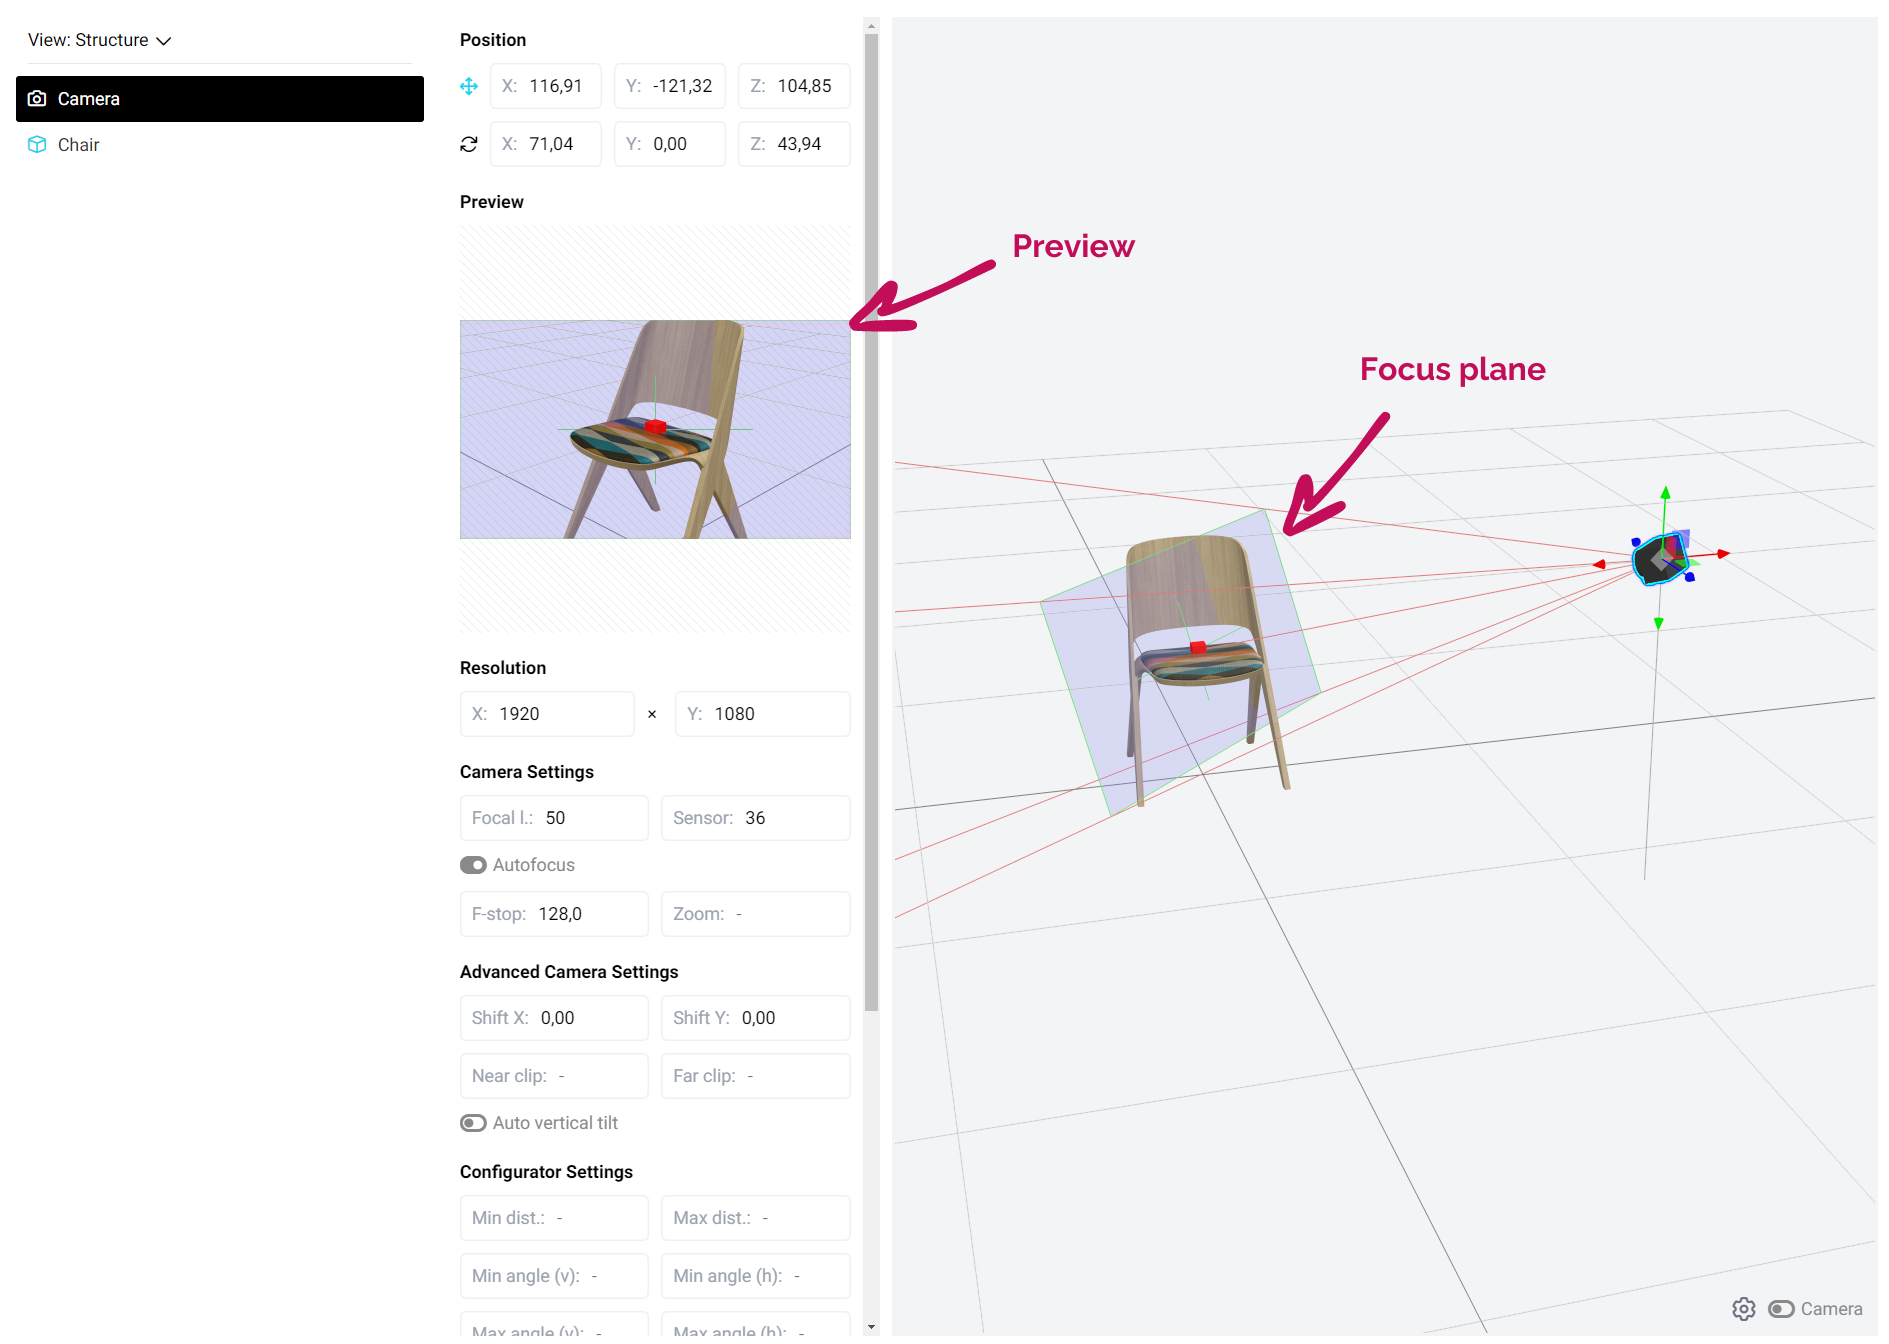
<figure><img src="/files/kUIXT38OyXVkslbe91Pp" alt=""><figcaption></figcaption></figure>

## Changing the Target and Focus

If you click on the camera target (or if you click on the camera again while it is selected) you can also move the target of the camera around.

<figure><img src="/files/Ff99vYEkqsYPN0zHoZ6M" alt=""><figcaption><p>Moving the target</p></figcaption></figure>

You will notice that the blue rectangle is changing while you are changing the target. This is because by default there is an *Autofocus* set and the camera is adjusting the focus depending on what you select as the target. But it is possible to **turn off** the *Autofocus* and set it manually. To do this press the  *Autofocus* toggle and then either:

* Choose a point or
* Set the focus plane distance manually in the *Focal distance* field

as you can see in the recording below:

<figure><img src="/files/xJBV0PfFFqaDCgEGEt5v" alt=""><figcaption><p>Changing the focus</p></figcaption></figure>

{% hint style="danger" %}
Please always make sure the focus plane intersect the area where you want your camera to focus, otherwise the image will be blurry.
{% endhint %}

## Focal Length

<figure><img src="/files/iCee8qPSelmQHS3vGbQW" alt=""><figcaption><p>Settings</p></figcaption></figure>

The focal length controls the level of zoom, determining how much of the scene is visible at once. A longer focal length results in a narrower field of view (more zoom), while a shorter focal length provides a wider field of view, allowing more of the scene to be visible at once (less zoom).

## Set Depth of Field

To achieve a DOF,  you have to set your *Focal distance* to the right point and then increase or decrease the *F-stop* (see the second arrow on the top screenshot). The lower *F-stop* is the narrower the depth of field will be and the higher the *F-stop* the larger the depth of field will be.

Therefore if you would like your image to be sharp everywhere set it to a high number (like 500) and if you would like your image to be blurry except&#x20;

<figure><img src="/files/a0AcT9f1i26hVHTwdJ9V" alt=""><figcaption><p>DOF</p></figcaption></figure>


---

# Agent Instructions: Querying This Documentation

If you need additional information that is not directly available in this page, you can query the documentation dynamically by asking a question.

Perform an HTTP GET request on the current page URL with the `ask` query parameter:

```
GET https://docs.colormass.com/building-blocks/scenes/camera.md?ask=<question>
```

The question should be specific, self-contained, and written in natural language.
The response will contain a direct answer to the question and relevant excerpts and sources from the documentation.

Use this mechanism when the answer is not explicitly present in the current page, you need clarification or additional context, or you want to retrieve related documentation sections.
