> For the complete documentation index, see [llms.txt](https://docs.colormass.com/llms.txt). Markdown versions of documentation pages are available by appending `.md` to page URLs; this page is available as [Markdown](https://docs.colormass.com/building-blocks/scenes/post-processing.md).
# Post Processing
If you already generated an image you can adjust the final look by applying various affects. All these effects can be controlled in the *Post Processing* node. If you click on the *Post Processing* node and the *Render Image* button:
Render button
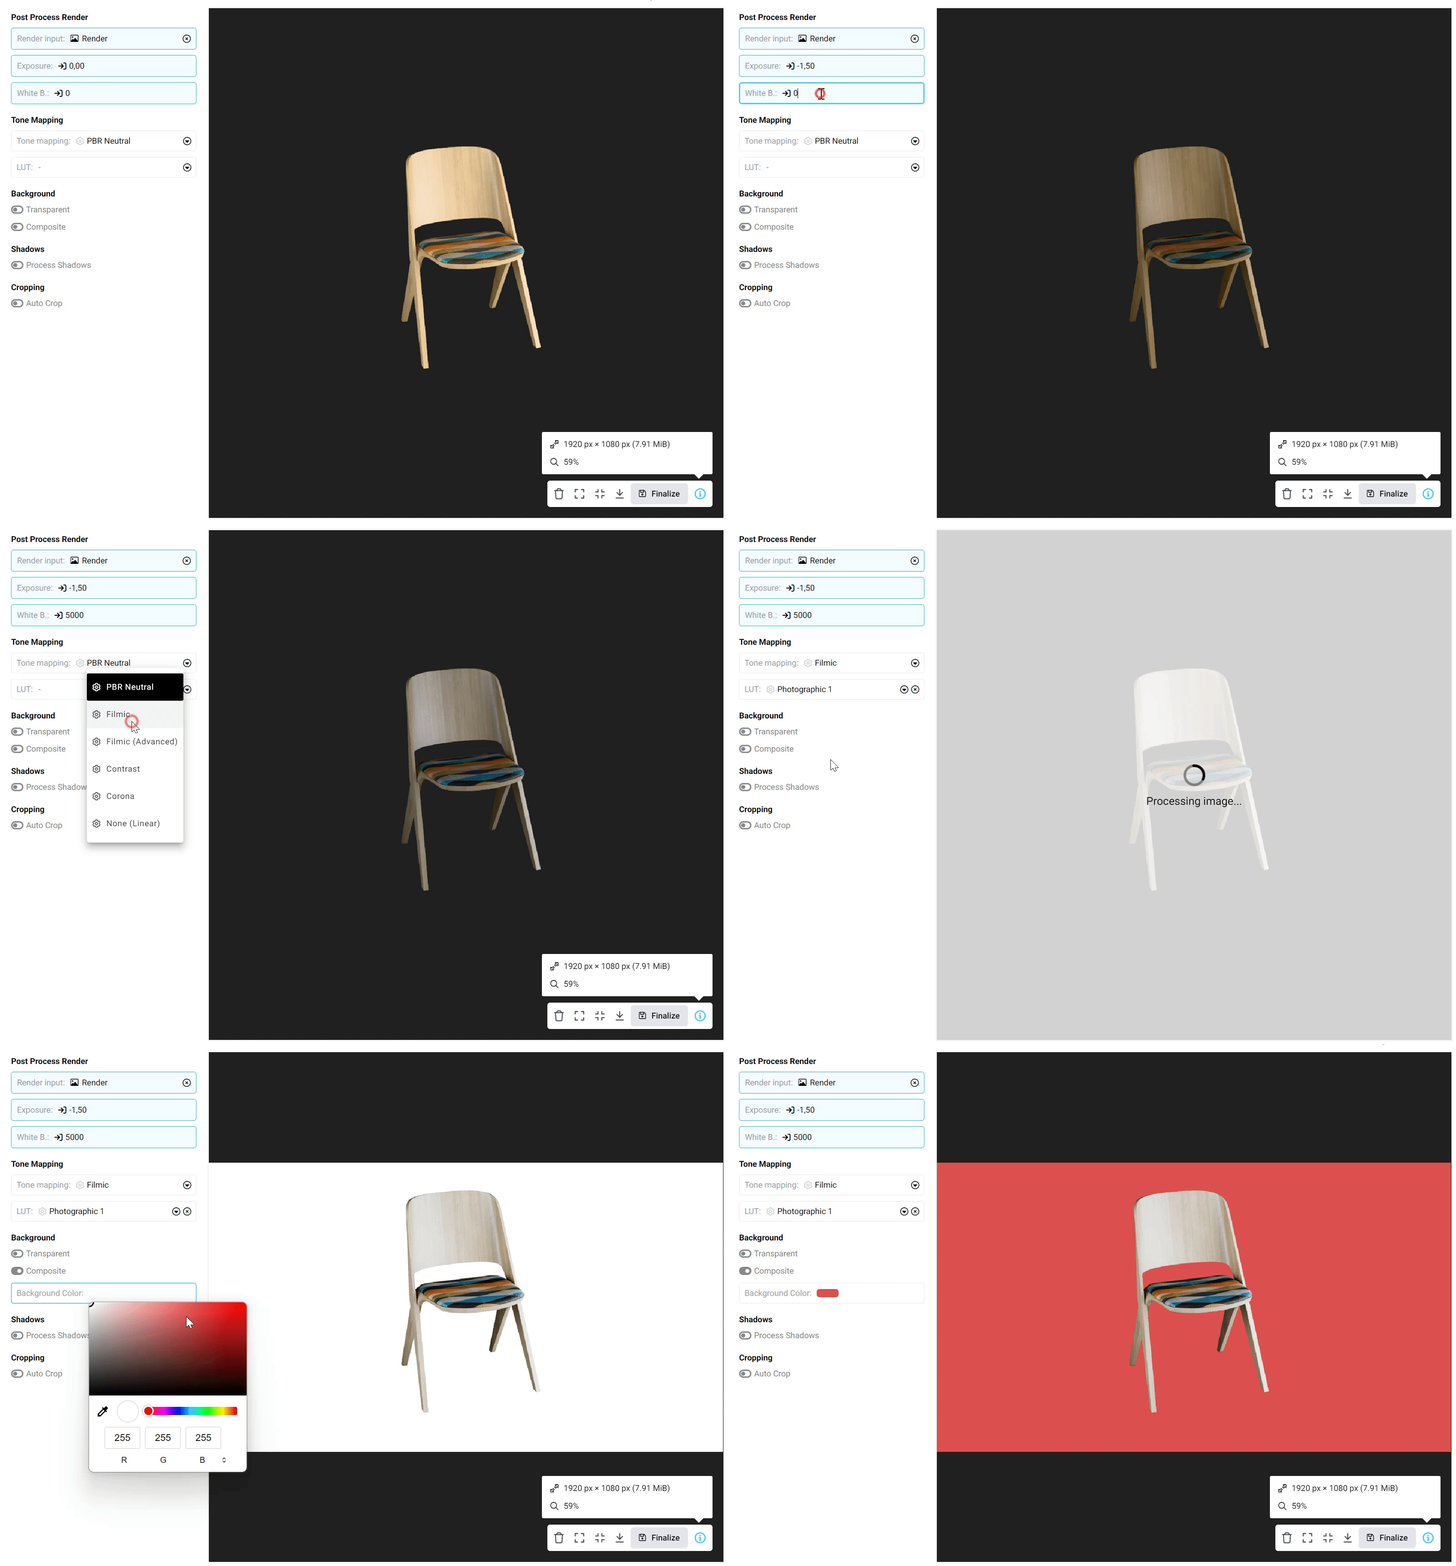
then you can see how the changes that you apply to the *Post Processing* node will affect your image. You can see a quick overview of the various options and their effect on the final render below.
Post processing options
The main options of post processing are:
* **Exposure**: Adjusts the exposure (brightness) of the image, with negative values making the image darker and positive values making it brighter.
* **White Balance (White B.)**: Adjusts the color temperature of the image to achieve accurate colors, where lower values make the image cooler and higher values make it warmer.
* **Tone Mapping**:
* **Tone Mapping Type**: You can select the algorithm to use when adjusting the tonal values of an image.
* **LUT (Look-Up Table)**: Applies a specific color grading to the image for visual style.
* **Background**:
* **Transparent**: Makes the background of the image transparent.
* **Composite**: Adds a background color to the image.
* **Background Color**: Here you can select the background color that is used in compositing.